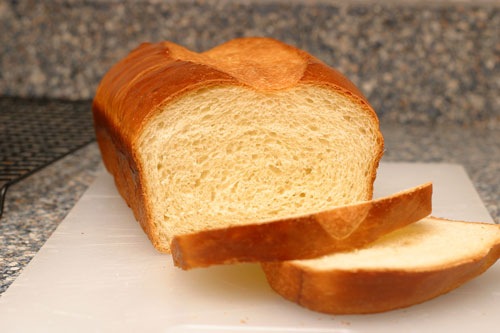
A good loaf of white bread is hard to find. Supermarket loaves are too airy, gummy and artificial. Artisan bakeries snub their nose at the basic white bread. Really, the only way to get a good loaf is to make it yourself.
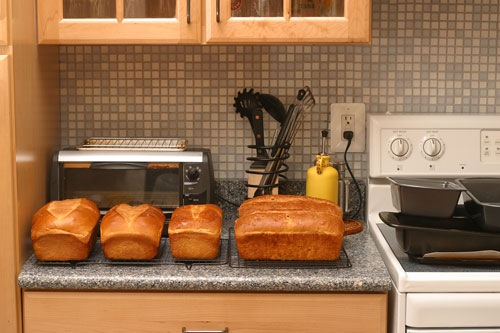
(The right two loaves are actually ACME High Rise Corn Bread…but that is a whole other post)
This recipe is pretty similar to the recipe I posted a while ago on sandwich bread. Sandwich breads fall under the category of “Enhanced Breads.” These are breads that are allowed to rise quickly and have added fat to make the bread soft and give it flavor. The two recipes are pretty similar, except this one comes from the great book The Bread Baker’s Apprentice. This is the best book on baking bread that I have read. It covers all of the basic techniques needed to make a great loaf. It also gives you a better understanding of all the aspects that affect how a loaf turns out. I highly recommend this book.
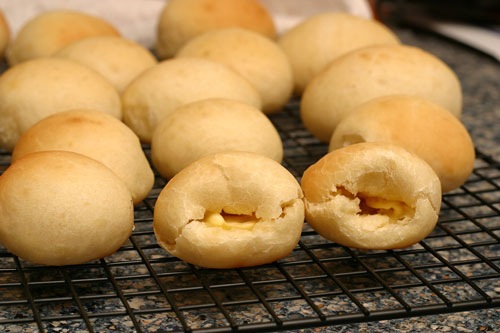
I have made this recipe a number of times, both for loaves and for rolls and it has worked out wonderfully every time.
Buttermilk Sandwich Bread aka White Bread

Notes:
Makes two 1-pound loaves, 18 dinner rolls, or 12 burger or hot dog buns
Ingredients:
- 4 3/4 cups (21.5 oz) unbleached bread flour
- 1 1/2 tsp (.38 oz) salt
- 3 tbs (1.5 oz) sugar
- 2 tsp (.22 oz) instant yeast
- 1 large (1.65 oz) egg, slightly beaten, at room temperature
- 1/4 cup (2 oz) butter, margarine or shortening, at room temperature, or vegetable oil
- 1 1/2 cups (12 oz) buttermilk or whole milk, at room temperature
Directions:
- Mix together the flour, salt, sugar and yeast in a 4-quart bowl (or in the bowl of an electric mixer). Pour in the egg, butter and 1 1/2 cups plus 1 tbs buttermilk and mix with a large metal spoon (or on low speed of the electric mixer with the paddle attachment) until all the flour is absorbed and the dough forms a ball. If the dough seems very stiff and dry, trickle more buttermilk until the dough is soft and supple.
- Sprinkle flour on the counter, transfer the dough to the counter, and begin kneading (or mix on medium speed with the dough hook), adding more flour, if necessary, to create a dough that is soft, supple, and tacky but not sticky. Continue kneading (or mixing) for 6 to 8 minutes. (In the electric mixer, the dough should clear the sides of the bowl but stick ever so slightly to the bottom.) Lightly oil a large bowl and transfer the dough to the bowl, rolling it to coat it with oil. Cover the bowl with plastic wrap. (I just use a dinner plate. -L)
- Ferment at room temperature for 1 1/2 to 2 hours, or until the dough doubles in size (the length of time will depend on room temperature).
- Remove the fermented dough from the bowl and divide it in half for sandwich loaves, into eighteen 2-ounce pieces for dinner rolls, or twelve 3-ounce pieces for burger or hotdog buns. Shape the pieces into boules for loaves, or tight rounds for dinner rolls or buns. (You really should buy the book, it has great instructions on how to do this. -L). Mist the dough lightly with spray oil and cover with a towel or plastic wrap. Allow to rest for about 20 minutes.
- Shape into loaves: Gently flatten the piece of dough with you hand, folding the edges to make an even-sided rectangle about 5″ wide and 6 to 8 ” long. Working from the short side of the dough, roll up the length of the one section at a time, pinching the crease with each rotation to strengthen the surface tension. The loaf will spread out as you roll it up, eventually extending to a full 8 to 9 inches. Pinch the final seam closed with your thumbs. Rock the loaf to even it out; do not taper the ends.
- Lightly oil two 8 1/2 by 4 1/2 inch loaf pans and place the loaves in the pans. For rolls and buns, line 2 sheet pans with baking parchment. Rolls require no further shaping. For hamburger buns, gently press down on the rolls to form the desired shape. For hotdog buns: Gently flatten the measured piece of dough and fold in the sides to square it off. Roll it up and seal the crease, creating surface tension. Rock and roll the dough into a torpedo shape. Transfer the rolls or buns to the sheet pans.
- Mist the tops of the dough with spray oil and loosely cover with plastic wrap or a towel. Proof the dough at room temperature for 60 to 90 minutes, or until it nearly doubles in size.
- Preheat the oven to 350 F for loaves or 400 F for rolls and buns. Brush rolls/buns with the egg wash and garnish with poppy or sesame seeds. Sandwich loaves also may be washed and garnished, or score them down the center and rub a little vegetable oil into the slit.
- Bake the rolls or buns for approximately 15 minutes, or until they are golden brown and register just above 180 F in the center. Bake loaves for 35 to 45 minutes, rotating 180 degrees halfway through for even baking, if needed. The tops should be golden brown and the sides, when removed from the pan, should also be golden. The internal temperature of the loaves should be close to 190 F, and the loaves should sound hollow when thumped on the bottom.
- When the loaves have finished baking, remove them immediately from the pans and cool on a wire rack for at least 1 hour before slicing or serving. Rolls should cool for at least 15 minutes on a rack before serving.
Pingback: Forget the loaves… make Rolls!
I have been using the recipe as written here for a few months as an all-purpose white bread. It has worked very well for me, except that I always find it in need of a splash or two of extra buttermilk. In consulting a copy of Reinhart’s book, though, I now notice that it calls for 1.5 ounces less flour than you have listed here. Could I be using a different edition or something?
I have been making this bread for quite awhile and loved it Decided to use Whole Wheat Flour for half of the required flour. I always give one loaf to a neighbor when I make this recipe. My neighbors like I have fallen in love with this bread
I’ve been dying to make some homemade bread and finally found the time this weekend. I saw your post and thought a buttermilk bread sounded really good. Even though mine didn’t turn out as pretty as yours did, it tasted awesome. Thanks for the recipe!
Pingback: Weekend Cooking & Baking « Sweet N Savory
You’ve inspired me with those delicious photos. Thus far, my bread making has heavily relied on my bread machine for the mixing and kneading. I’ve just been too intimated to do it on my own. However, your explanation makes me want to attempt it. Thanks for a great recipe and for simple instructions.