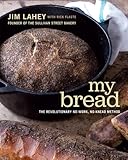
So I know I am a little late to the “No-Knead Bread” party, but I am now a believer. I just got Lahey’s new book, My Bread. He is the guy that popularized this method. I know there is tons of stuff out there on making no-knead, but sometimes I just like books better.
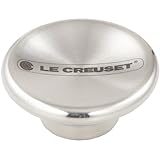
In addition to ordering the book, I also got a metal knob for my Le Creuset 7qt Dutch Oven. For this method, you bake the bread in a dutch oven or similar pot. The regular plastic knob it comes with can’t handle the high oven temperatures.
The knob came first so I gave the pot a try using some old dough I had in the fridge from a batch of 5-Minute Artisan Bread. The technique worked out pretty good, but the high heat of the oven left my Le Creuset in less than pristine condition. There must have been a thin layer of oil on the outside of the dutch oven, because it got a little scorched and was a pain to scrub off.
This got me thinking that using a very expensive pot may not be the best idea. In his book he also recommends Lodge Cast Iron Dutch ovens, which are very affordable and jet black so you don’t have to worry about staining. His favorite is a pot from Emil Henry, but they are even more expensive than Le Creuset!


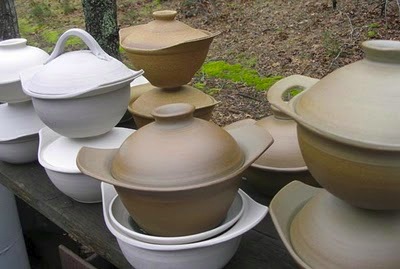
My friend Katya, who has a great baking blog, has been testing out a ceramic baking pot that is handmade and designed for baking bread. She has had a lot of success with it, and it looks like the first production batch is just becoming available.
However, I had a slow day at work, so I kept poking around. I came across the idea of using a pizza stone covered with an upside down terra cotta flower pot. I already had a pizza stone, so I thought I would give this a try.
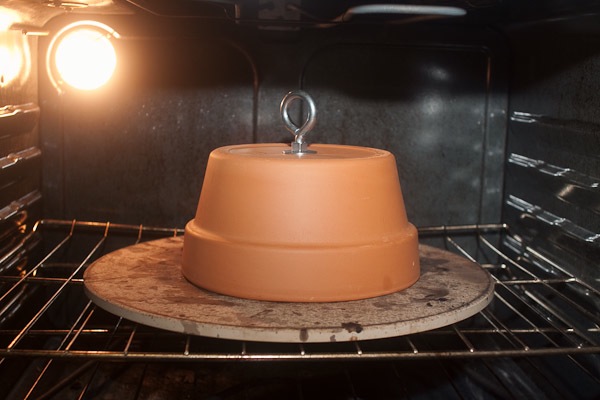
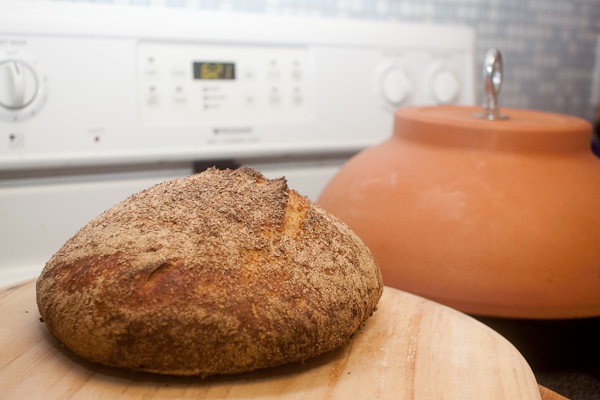
The first pot I tried was a 8.5″ bulb pan, as recommended in the post. The bread from My Bread was a little wide though and a little bit ended up not fitting under the pot. The results were amazing though! I have never gotten as much rise out of a bread, even a no-knead one, and the crust was amazingly good… crackly and chewy. After this success I went up to the closest gardening center to try and find a larger bulb pan. Unfortunately they seem to be sort of seasonal. However I managed to find a much better pot. It is a shallow bowl that when flipped upside down, seems to mimic the shape of a much larger wood fired oven. It is called Low Bowl, 31cm and it is made by Silma in Italy. It is 10″ across and cost about $10.
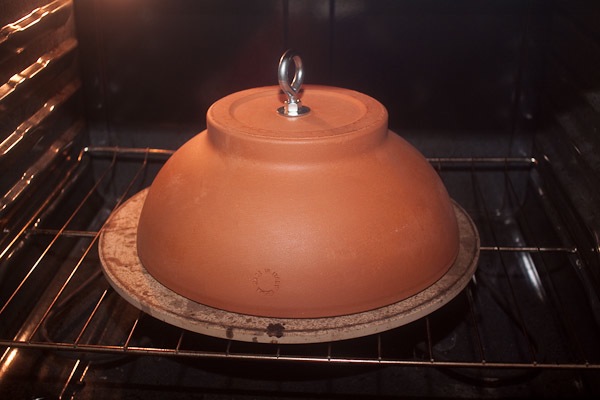
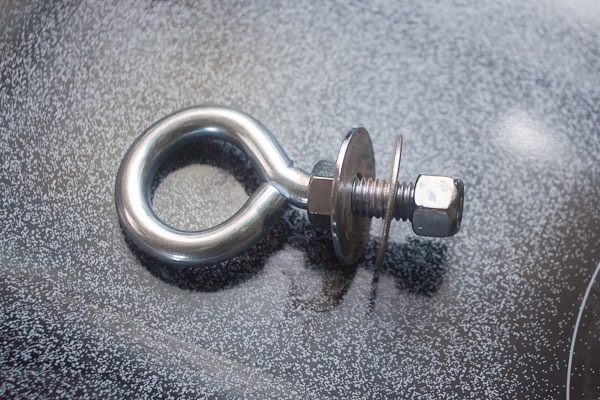
Both of these pots have drainage holes on the bottom. In order to block them and make the pots a little easier to handle, I improvised a little handle using some supplies from the hardware store. It is simply an eye bolt held in place with two large flange washers and lock nuts. I made sure not to tighten it too much just in case the pot and metal expand at different rates. Both pots are unglazed terra cotta, which is very important because some glazes have lead in them and are not food safe.
So far I have tried making a basic no-knead loaf and one with a little bit of rye flour. Both were very impressive. I have nothing against kneading, I just like these breads!
I found a couple other tools which will make it a little easier, quicker and less messy to work with this dough. The first thing is to get a bunch of wheat bran. I found some for $.89 a pound in the bulk section of our local health food store. I mix that with a little corn meal and I have had no trouble getting my breads off my wooden peel and onto the pizza stone. That is another thing, get a wooden peel. The wooden ones hold onto the corn meal and flour a little better, making it easier to spread them on the peel and prevents it from all sliding off on to your oven. Also don’t be afraid to use a bunch of bran on the peel, it will make your life easier. Spread a circle large than the size of your dough because the dough will spread out as it rises. I brush off the excess around the loaf before I put it in the oven.
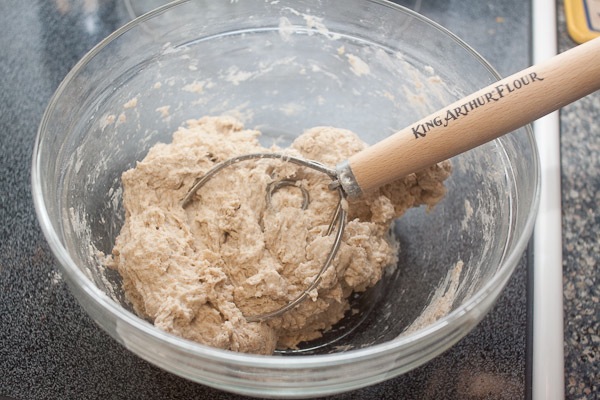
Another great tool, which I just got, is this dough whisk from King Arthur. I of course got a bunch of other stuff when I ordered it… it was tough to resist. This whisk makes it easy to mix up the dough and is a cinch to clean. I just let the dough rise in the mixing bowl, leaving very little to clean. They also have a great plastic dough scrapper which makes it easier to get the dough out of the bowl and then shape.
The final tip… use a scale! Scales make it really quick to measure out your ingredients. You don’t have to tediously scoop and level, just keep adding flour or water until you hit your number. It is also more accurate, which is an added bonus.
So there you have it, for under $15 ($30 if you don’t have a pizza stone), you are able to create your own rustic style breads. Granted this is nothing new, but using a flower pot makes it even cheaper!
Do you preheat the flower pot like you would the dutch oven?
Thanks
Klarence
I have never seen the bread baked under the flower pot. It seems that the pot is just put over the dough upside down
I have a kit that uses a large upright flowerpot that you fill with the dough supplied, mixed with a can of warm beer. Place a piece of foil over the hole in the bottom and fill the pot with dough then coat with melted butter and bake. It rises above the top of the flower pot and is easy to slide out when finished if the sides of the pot were greased generously.
Great idea! Much easier than dumping the dough into the flower pot. Question…do you bake the bread in the flower pot for the entire cooking time or do you remove the pot after the first 30 minutes and continue to bake, uncovered, for the remaining 25 or so minutes?
Thanks!
I usually cook it with the lid on for the first 20-30 minutes depending on the size of the bread. I want to get as much ovenpspring out of it as possible, and the lid helps capture the steam as the moisture in the bread is baked off. I then take it off for the last portion to allow for it to brown.
Hello from the maker of The BreadPot! They are ready, much improved by my testers’ input at http://www.breadbakers.blogspot.com
Your bread baker idea is great, it is akin to my attempts to use what I had around. The difference with The BreadPot is that it shapes the bread so it is not so wide and flat. The rounder loaf bakes evenly, slices to a nice slice, and is quite beautiful to behold, not that your crusty specimen is any thing less than lovely. Any friend of Katya is a friend of mine. Judy
Judy Motzkin Studio
Hi Judy,
Your pottery is amazing!! I think the BreadPot maybe the best option. It seems like it would help shape it into a more rounded loaf, and it is probably easier to get in out of the oven. My breads still don’t come close to what Katya is making!
– Luke
Super inventive! Your bread looks great, too!