I keep meaning to do a long post on food photography, but never seem to get around to it. I started one here, but never really finished it. Posts on food photography is one of New Years resolutions, so now I have no choice but to do it! I am going to change my plan of attack though and start with a bunch of shorter posts. I am going start with illustrating the basics and then focus on using flashes to do food photography. A lot of these topics are covered in general photography books, but things are a little different when you are focusing a plate of food two feet away verses than a mountain range.
The first topic I am going to cover is depth of field, which is the amount of stuff your camera can have in focus at once. A large depth of field means that objects at a wide range of distances are all in focus at the same time. A shallow depth of field means that the focus will be very selective. You maybe able to keep one thing in focus and everything in front or behind it will be blurry. I am not a photographer, so I am going to keep it simple and explain it the way I understand it.
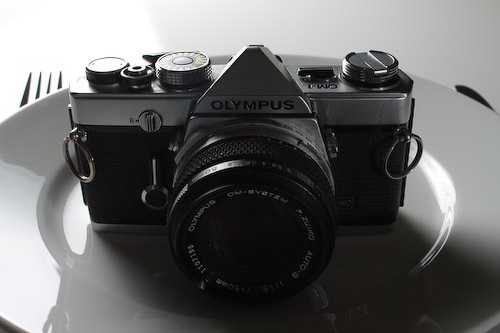
The depth of field is controlled by the aperture of your lens. The lens has metal blades which snap together right before each photo is taken. The size of the opening these blades make is the aperture, which is measured in f-stops.
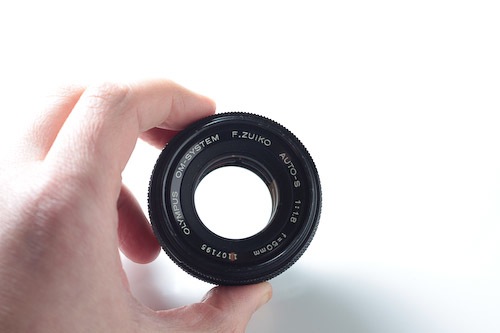
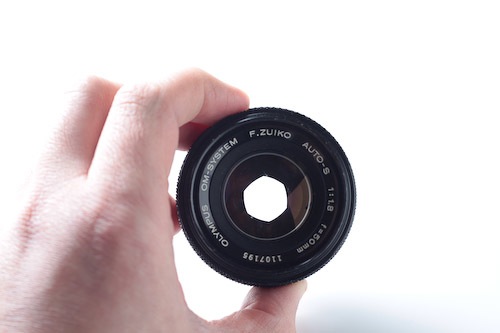
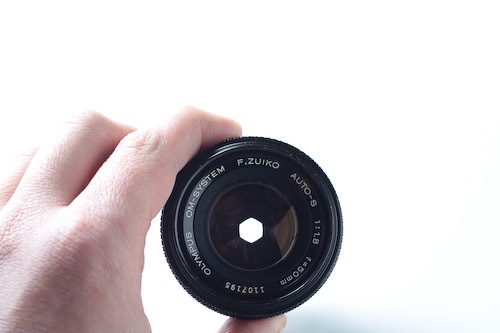
Here is where it gets tricky. A smaller opening corresponds to a larger depth of field and a larger the f-stop number. Most lens’ highest f-stop is 16 or 22, which is a really small opening. Lens will have a lower f-stop of anywhere between 2 and 4. When the aperture is set to these lower f-stops, the metal blades do not close at all, letting as much light through as possible. With the lens blades wide open, the area in focus is very small.
There is one more fun relationship that you might have guessed. As you make the size of your aperture smaller, you need more light to get the correct exposure. In order to increase the depth of field and get more of the picture in focus, you need to get more light. The are a couple of different ways to get more light:
- if you are using flashes, you can increase the power of the flash
- if you are using light from a window or lamp, you can keep the shutter open longer
- make your camera more light-sensitive by increasing the ISO speed
There is one last thing to remember when thinking about depth of field–the camera’s distance from the object you are trying to photograph also effects the depth of field. The closer you get to an object, the smaller the depth of field. When you get really close to a plate of food to capture some detail, it becomes harder to have the whole plate in focus. As you move closer to an object, you have to increase the f-stop to keep the same depth of field.
Here is a chart to help illustrate how depth of field is affected by all of these different aspects, with the arrows showing the direction of the relationship.
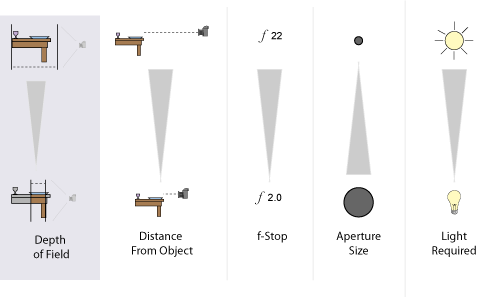
Right about now you are probably pretty confused. The thing to focus on (pun intended) is that you control how much of your photo is in focus by change the depth of field by changing the aperture or f-stop. There is a lot of math going into all of this, but luckily there is an online calculator which lets you see how all of these aspects are related.
Additionally, cameras have gotten very smart. Simply set your camera to Aperture Priority mode and it will do the rest. You can choose an f-stop and the camera will do the rest to ensure that you get the correct exposure. The f-stop depends on what look you are going for. If you are using an SLR camera the view finder will look the same no matter what you set the aperture to. This is because the camera opens the aperture up all the way for focusing and only shuts it down when a photo is taken. Most SLR’s have a depth of field preview button which stops down the lens to the aperture you are using and gives you a preview of what your depth of field will be.
The real question is why would you want to do this? Well, being selective in focusing can direct the viewer towards the important parts of the photo and blur away clutter. At the same time you want to have enough of the photo in focus so the viewer can figure out what is going on. This is where composition and artistry comes into play.
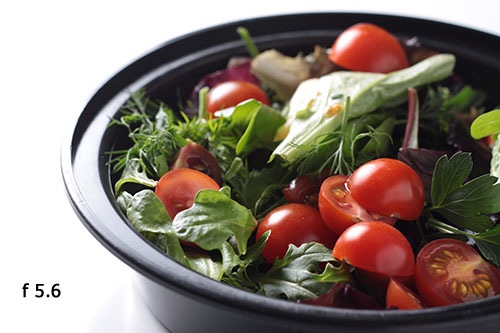
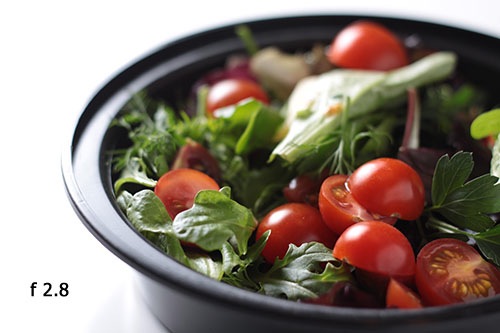
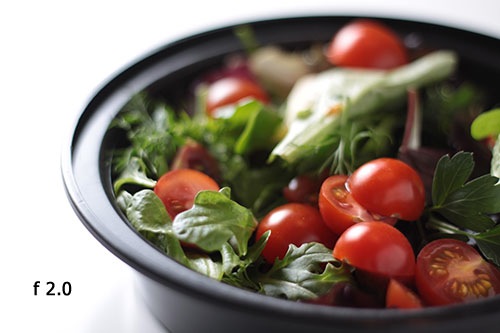
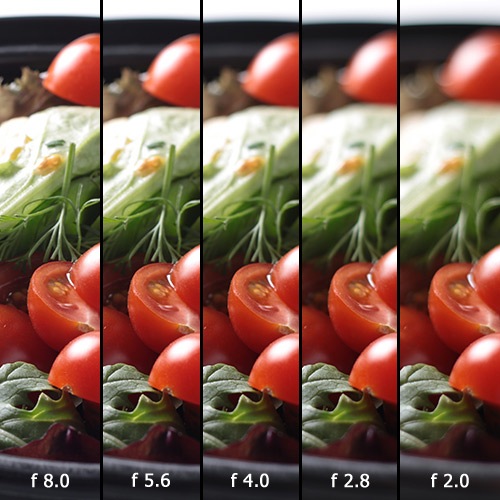
Below is the same photo taken with different f-stops. This should help you better visualize the effects you can create. If you want to include everything that is on a plate, use a higher f-stop. If you want to focus on a detail, go with a lower f-stop. In order to keep the exposure the same for each photo, I turned down the flash each time I stepped the f-stop down. I started at f 8.0 because that was the highest f-stop I could get with my flash turned up all the way. If I wasn’t so lazy I could have increase the ISO sensitivity of the camera. Photography is full of trade-offs!


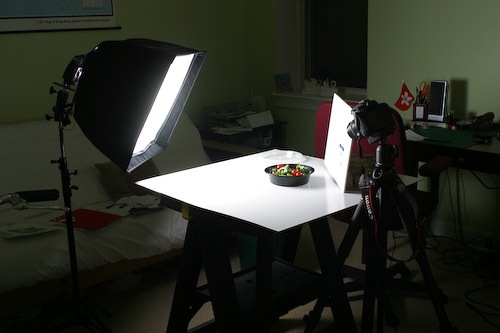
The lighting setup I used is below. It is a single flash, shot through a soft box. There is a small piece of foam core opposite the flash to help fill in shadows.
I got a 550D. Amazing those dslr’s,
And I love to read your blog ( oke, just started actualy ).
Busy to build an area in the house to set up a ‘set up’.
About your setup, 1. what color ( K ) of light did you use and 2. how much lumen or watt did you shine on your plate?
Greetz
for great sharp clear low-light macro food photos, what lens for my Canon EOS 550D?
-I am seeking for a great solution (at good value $$$) for
close-up food photography in low light conditions: for ie, at restaurant dinings with very weak light and yet get sharp clear close up detailed pics from such condition with no use of flash.I bought the 550D but now I am searching for the right lense to go with it: What do you think of a 60mm f2.8 paired with the 550D? Any better suggestion given what I want to do?
Also: Would the 550D paired with a 60mm f2.8 make superior low light macro food dinnerâ??s food pics than a Canon 350D paired with a Canon EF 50 mm f/1.4 lens?
PS: I do understand the necessity of the tripod, but most restaurants will never accept that I get in with a Tripod. I havenâ??t yet used that Canon EOS 550 (just have the body and I am now planning for the Lens), but if this is going to be shaky enough to the point that taking photos without a tripod would be impossible, please let me know: I will return the digital SLR.
Thanks to all for your replies.
Good questions! I think the Canon 550D should be a great body. It has gotten good reviews and can even take movies. That said, I am not sure if it the results will be noticeably better that a 350D. Both should be able to do a good job. I believe the 550D should be able to use higher ISO settings without getting noisy. That means that it will be more sensitive during low light.
As for lens, the 50mm f1.4 will actually work better in low light. The f-stop of a lens is how wide the lens can open up and a lower number is better. The 60mm is macro lens though, which will let you get closer to the food. That is great for small objects or when you want to capture a praticular detail and not the whole plate.
I think both setups would work well. As long as you are not working by candle light, I don’t think you should have too much of a problem with a lack of light.
Some local camera shops let you buy a lens and then return it if you don’t like it. That could also be an option.
I have a Nikon D60 and use a 18-200mm VR 3.5-5.6 lens. I am taking photos of foods for a book I am writing and need some help to choose the right lens.
The foods I photograph are at the restaurants that I buy them at, so lighting is dependent on each restaurant. I suppose I could use flash, but I don’t really want to get into flash photography inside the restaurants I visit.
I noticed with my lens that I have to zoom in to get the AF to work best. Also, the depth of field is pretty shallow, and shutter speeds become slow.
I started to consider using a macro lens, but I’m wondering if I really need one. I don’t intend on shooting anything smaller than a muffin.
My goal is to be able to shoot a plate of food and to have most or all of the food in focus. And to be able to do this in a restaurant where the lighting will most likely be less than perfect.
Can you give me some advice?
Hi Eddie, good questions! I sound like you are running into two different things. The reason you have to zoom in, in order to correctly focus has do with your lens minimum focusing distance. When you are zooming, what you are actually doing is moving the camera farther away from the food, but keeping the image the same. Lens have a minimum distance they need to be away from the subject in order to correctly focus. Most Macro lens don’t enlarge things any more than a regular lens. The difference is that they have no minimum focusing length. You can get as close as you want to, which works out great for shooting in a cramped environment(restaurant).
Both Nikon and Canon have a 100mm~ & 60mm~ lens. I have the 100mm Macro lens from Canon and I sort of wish I went for the 60mm version. With the zoom factor of my Camera (50D) that 100mm lens ends up being about 160mm and that is a lot of zoom. In order to fit plate in, I have to back up quite a bit. That said, it is an amazingly well made lens and great for taking close-ups of things. If you have a camera that does not have a full-sized sensor, a 60mm macro should be about perfect.
As for the shallow depth of field,that has to do with the amount of light in the restaurant. In order to increase the depth of field, you have to increase the f-stop number. For that to work though, the camera needs more light. You have a couple of options here. The easiest is to increase the ISO setting on the camera. That makes the camera more sensitive. The other option is to increase the amount of time the shutter is open, but that means holding the camera really steady. A small tripod might come in handy.
One other thing to look at is bring a piece of printer paper or a reflective disc. You can uses these to better help bounce light and fill in any shadows if the light is not right.
Here are some things you might want to check out
Thank you so much for the explanations! I’m not camera savvy so, your tutorials are the sorts that I’m looking for – Actions & Proofs. Not just blah, blahs with thousands of lines and photography terms that only pros understood… :-P
I hope to see more tutorials like which angle to look for the best shots, bring out the best in food & beverage serve in glasses, etc.
Thank you for sharing the infos and I’m waiting for the next tutorial!
Thanks! Those are some good suggestions. I am still trying to figure some of the things, like what angle to use. It seems to be more style based, and less formal rules.
Hehe, thanks for sharing, Luke! Just the kind of nice tutorial I was hoping for. I saved this for later. ;)